
Warning: Undefined array key "file" in /home/y7jlji9ew90e/serkanseker.com/wp-includes/media.php on line 1788
Contents
Hello to everyone. In this post, I will show you how to add an image we selected from the gallery on the Xamarin.Android platform into ImageView. Our motivation is to create a contact page and add people by taking name and profile photo from this page.
In this project, I will use Xam.Plugin.Media plugin for image operations. You can access other plugins related articles from the post called Top 5 Useful Plugins in Xamarin.
Download Xam.Plugin.Media
You can download this plugin by running the following command on the command line.
Install-Package Xam.Plugin.Media -Version 5.0.1Or you can download it by right-clicking the project, entering NuGet Package Manager and searching there.

Create Layout
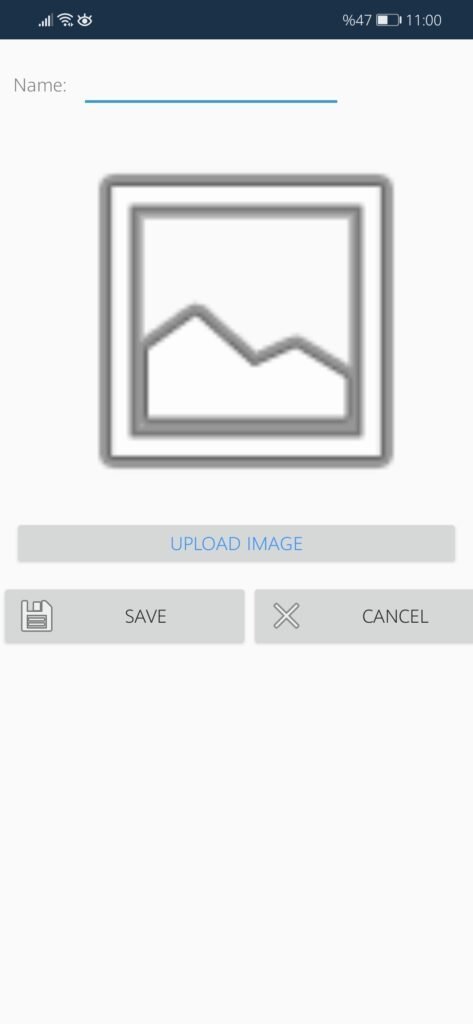
To make the user interface of the person adding page, right-click the layout folder in the Resources folder in the project and create a new page by selecting Add > New Item > XML File. I named this page AddPerson.xml.
The codes for this page will be as follows:
<?xml version="1.0" encoding="utf-8" ?>
<LinearLayout
xmlns:android="http://schemas.android.com/apk/res/android"
android:orientation="vertical"
android:minWidth="25px"
android:minHeight="25px"
android:layout_width="match_parent"
android:layout_height="match_parent"
android:id="@+id/linearLayout1">
<LinearLayout
android:layout_width ="match_parent"
android:layout_height="wrap_content"
android:layout_margin="10dp">
<TextView
android:layout_width ="wrap_content"
android:layout_height ="wrap_content"
android:text ="Name:"
android:layout_marginRight ="10dp"
android:layout_marginBottom="6.6dp"
android:layout_marginTop ="14.6dp" />
<EditText
android:id ="@+id/nameInput"
android:layout_gravity="center"
android:layout_width ="200dp"
android:layout_height ="wrap_content"
android:textColor="#3692FB"/>
</LinearLayout>
<LinearLayout
android:orientation="vertical"
android:layout_width ="match_parent"
android:layout_height ="wrap_content"
android:layout_marginLeft ="10dp"
android:layout_marginRight ="10dp"
android:layout_marginBottom="10dp"
android:minWidth="25px"
android:minHeight="25px">
<ImageView
android:src="@android:drawable/ic_menu_gallery"
android:layout_width="354.5dp"
android:layout_height="298.5dp"
android:id="@+id/imageView" />
<Button
android:text="Upload Image"
android:layout_width="match_parent"
android:layout_height="match_parent"
android:minWidth="25px"
android:minHeight="25px"
android:id="@+id/uploadButton"
android:textColor="#3692FB"/>
</LinearLayout>
<LinearLayout
android:orientation="horizontal"
android:minWidth="25px"
android:minHeight="25px"
android:layout_width="match_parent"
android:layout_height="62.0dp"
android:id="@+id/linearLayout2">
<Button
android:layout_width ="190.0dp"
android:layout_height="wrap_content"
android:text ="Save"
android:id ="@+id/saveButton"
android:drawableLeft="@android:drawable/ic_menu_save" />
<Button
android:layout_width ="190.0dp"
android:layout_height="wrap_content"
android:text ="Cancel"
android:id ="@+id/cancelButton"
android:drawableLeft="@android:drawable/ic_menu_close_clear_cancel" />
</LinearLayout>
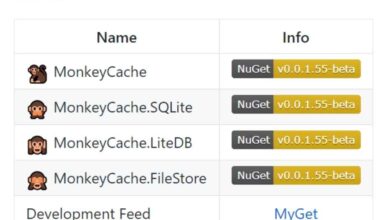
</LinearLayout>The screen output will also look like this:
Create Activity
Now we need to declare the layout page in Activity. To do this, first define the necessary variables and define their click methods in the OnCreate() method.
In the UploadPhoto () method, I used the Bitmap class while importing the image into ImageView. Converted all bytes of the selected image to arrays with the File class, and then Decoded that array.
    [Activity(Label = "@string/app_name", Theme = "@style/AppTheme", MainLauncher = true)]
    public class MainActivity : AppCompatActivity
    {
        EditText name;
        ImageView ImgView;
        string filePath;
        protected override void OnCreate(Bundle savedInstanceState)
        {
            base.OnCreate(savedInstanceState);
            SetContentView(Resource.Layout.AddPerson);
            FindViewById<Button>(Resource.Id.saveButton).Click += OnSaveClick;
            FindViewById<Button>(Resource.Id.cancelButton).Click += OnCancelClick;
            FindViewById<Button>(Resource.Id.uploadButton).Click += OnUploadButton;
            ImgView = (ImageView)FindViewById(Resource.Id.imageView);
            name= FindViewById<EditText>(Resource.Id.nameInput);

        }
        private void OnUploadButton(object sender, EventArgs e)
        {
           UploadPhoto();

        }

        async void UploadPhoto()
        {
            await CrossMedia.Current.Initialize();

            if (!CrossMedia.Current.IsTakePhotoSupported)
            {
                Toast.MakeText(this, "Upload not suported ", ToastLength.Short).Show();
                return;
            }
            var file = await CrossMedia.Current.PickPhotoAsync(new Plugin.Media.Abstractions.PickMediaOptions
            {
                PhotoSize = Plugin.Media.Abstractions.PhotoSize.Small,
                CompressionQuality = 40
            });
            filePath = file.Path;
            byte[] imageArray = System.IO.File.ReadAllBytes(filePath);
            Android.Graphics.Bitmap bitmap = BitmapFactory.DecodeByteArray(imageArray, 0, imageArray.Length);
            ImgView.SetImageBitmap(bitmap);

        }
        private void OnCancelClick(object sender, EventArgs e)
        {
            Finish();
        }
        public  void OnSaveClick(object sender, EventArgs e)
        {
            string name = FindViewById<EditText>(Resource.Id.nameInput).Text;
            string image = filePath;

            var intent = new Intent();
            intent.PutExtra("PersonName", name);
            intent.PutExtra("Image", image);
            SetResult(Result.Ok, intent);

            Finish();

        }
    }
Methods
Xam.Plugin.Media Methods
- IsTakePhotoSupported() : Gets if ability to take photos supported on the device
- Task<MediaFile> PickPhotoAsync(PickMediaOptions options = null) : Media file or null if canceled . You can set PhotoSize as Small, Medium, or Large and CompressionQuality as number that between 0 and 100.
File Class Methods
- ReadAllBytes(String) : Opens a binary file, reads the contents of the file into a sequence of bytes, and then closes the file.
BitmapFactory Class Methods
- DecodeByteArray(Byte[], Int32, Int32) : Decode an immutable bitmap from the specified byte array.
Conclusion
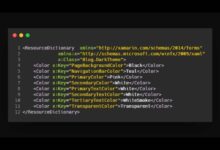
Our application is ok. The name and image you add on the person adding page are sent as PutExtra in the OnSaveClick () method. On other pages, you can pull this extras and access the name and image values.
Now let’s run the application and see how it looks: